Mastodon

Having a detailed look at the Netgear Nighthawk M5 Mobile LTE/Router

Dr . Watson

After gaining root access to the device in the first post of this series, we will have a closer look at the device and its firmware.

This post is documenting some internals of the device which is not the most exciting stuff to read. I mainly collected it here for documentation purposes.

All information in this post has been collected from a device running firmware version NTGX55_12.04.12.00.

Software

Netgear’s firmware is Linux-based and uses quite a lot of common open-source tools. They provide all modifications to GPL licensed code via their support area: NETGEAR Open Source Software for Programmers.

From what I can tell only their user interface and configuration management is developed by Netgear themself apart from a bunch of binary blobs provided by Qualcomm which contains the modem firmware which gets loaded to the baseband processor.

One curiosity catched my eye: there is a running X server on the device. It is used by the front-panel display of the device. A custom application developed by Netgear uses Webkit’s engine to render the touch screen interface which just like the web UI is based on HTML and Javascript.

Here is an almost complete list of open source software components which I found on the device:

  • atk (v2.28)
  • Avahi (v0.7)
  • bash (v4.4.23)
  • base-files (v3.0.14)
  • BusyBox (v1.29.3)
  • conntrack-tools (v1.0.1)
  • D-Bus (v1.12.10)
  • ddclient (v3.8.1)
  • dhcpcd (v5.2.10)
  • DiG (v9.11.5-P4)
  • Dnsmasq (v2.85)
  • ethtool (v4.19)
  • font-config (v2.12.6)
  • freetype (v2.9.1)
  • glib (v2.58.0)
  • hostapd (v2.8-devel)
  • iproute2 (iproute2-ss140804)
  • iptables (v1.6.2)
  • iw (v4.14)
  • libcap (v2.25)
  • libnfnetlink (v1.0.0)
  • Linux Kernel (v4.14.117)
  • miniupnpd
  • mtd-utils (v2.0.2)
  • nettle (v3.4)
  • OpenSSL (v1.1.1b)
  • pimd (v2.1.8)
  • pppd (v2.4.7)
  • strace (v4.24)
  • SystemD (v239)
  • tinyproxy (v1.8.3)
  • util-linux (v2.32.1)
  • wireless-tools (v30)
  • wpa_supplicant (v2.9)
  • Xorg (v1.20.1)
  • xz (v5.2.4)

Basic facts

Lets first have a look at the Kernel version:

$ uname -a
Linux sdxprairie 4.14.117 #1 PREEMPT Thu Aug 19 23:42:26 UTC 2021 armv7l GNU/Linux

/ # cat /proc/version
Linux version 4.14.117 (oe-user@oe-host) (clang version 6.0.9 for Android NDK) #1 PREEMPT Thu Aug 19 23:42:26 UTC 2021

Apparently the firmware has been built by Open Embedded as indicated by the kernel notice „oe-user„.

There is also a /target file lying around. I assume that „sdxprairie“ is Qualcomm’s name for the SDK/BSP which is used by Netgear.

$ cat /target
sdxprairie

The application processor of the Snapdragon X55 is a fairly low powered single-core ARM v7:

$ cat /proc/cpuinfo
processor       : 0
model name      : ARMv7 Processor rev 5 (v7l)
BogoMIPS        : 38.40
Features        : half thumb fastmult vfp edsp neon vfpv3 tls vfpv4 idiva idivt vfpd32 lpae evtstrm
CPU implementer : 0x41
CPU architecture: 7
CPU variant     : 0x0
CPU part        : 0xc07
CPU revision    : 5

Hardware        : Qualcomm Technologies, Inc SDXPRAIRIE
Revision        : 0000
Serial          : 0000000000000000

With around 780 MB of RAM:

$ free -m
             total       used       free     shared    buffers     cached
Mem:           781        387        393          0          0        142
-/+ buffers/cache:        245        535
Swap:          109          0        109

SoC details

Within the SysFS we can find some details about the SoC. More details about the meaning can be found in the Kernel documentation:

SysFS EntryValue
/sys/devices/soc0/accessory_chip0
/sys/devices/soc0/chip_family0x5e
/sys/devices/soc0/chip_nameSDX55
/sys/devices/soc0/familySnapdragon
/sys/devices/soc0/foundry_id1
/sys/devices/soc0/hw_platformMTP
/sys/devices/soc0/image_crm_version:ntgrbc-fwbuild6
/sys/devices/soc0/image_variantMAATANAZA
/sys/devices/soc0/image_version00:BOOT.SBL.4.1-00231
/sys/devices/soc0/machineSDXPRAIRIE
/sys/devices/soc0/ncluster_array_offset0xb0
/sys/devices/soc0/ndefective_parts_array_offset0xb4
/sys/devices/soc0/nmodem_supported0xffffffff
/sys/devices/soc0/nproduct_id0x410
/sys/devices/soc0/num_clusters0x1
/sys/devices/soc0/num_defective_parts0xd
/sys/devices/soc0/platform_subtypeInvalid
/sys/devices/soc0/platform_subtype_id5
/sys/devices/soc0/platform_version65536
/sys/devices/soc0/pmic_die_revision131072
/sys/devices/soc0/pmic_model65568
/sys/devices/soc0/raw_device_family0x6
/sys/devices/soc0/raw_device_number0xb
/sys/devices/soc0/raw_id207
/sys/devices/soc0/raw_version2
/sys/devices/soc0/revision2.0
/sys/devices/soc0/select_image0
/sys/devices/soc0/serial_number27453XXXX
/sys/devices/soc0/soc_id357
/sys/devices/soc0/vendorQualcomm
$ cat /sys/devices/soc0/images
0:
        CRM:            00:BOOT.SBL.4.1-00231
        Variant:        MAATANAZA
        Version:        :ntgrbc-fwbuild6
1:
        CRM:            01:TZ.FU.5.9-00147
        Variant:        EATAANBAA
        Version:        :CRM
11:
        CRM:            11:MPSS.HI.2.0.c3.5-00010-SDX55_CPEALL_PACK-1.403198.3
        Variant:        sdx55.gennatch.prod
        Version:        :ntgrbc-fwbuild6

Kernel command line

$ cat /proc/cmdline<br>noinitrd rw rootwait console=ttyMSM0,115200,n8 androidboot.hardware=qcom msm_rtb.filter=0x237 androidboot.console=ttyMSM0 lpm_levels.sleep_disabled=1 firmware_class.path=/lib/firmware/updates service_locator.enable=1 net.ifnames=0 atlantic_fwd.rx_ring_size=1024 pci=pcie_bus_perf rootfstype=ubifs rootflags=bulk_read root=ubi0:rootfs ubi.mtd=24 androidboot.serialno=105d0dc7 androidboot.baseband=msm

Kernel log

Unfortunately, I was not able to capture early kernel log messages. I assume those are only printed via a serial port and lost as the circular buffer for the kernel log has not been set up.

More details…

Feel free to contact me if I missed any particular detail which is interesting for you.

A 3D-printed wall mount for Netgear Nighthawk mobile 5G/LTE routers

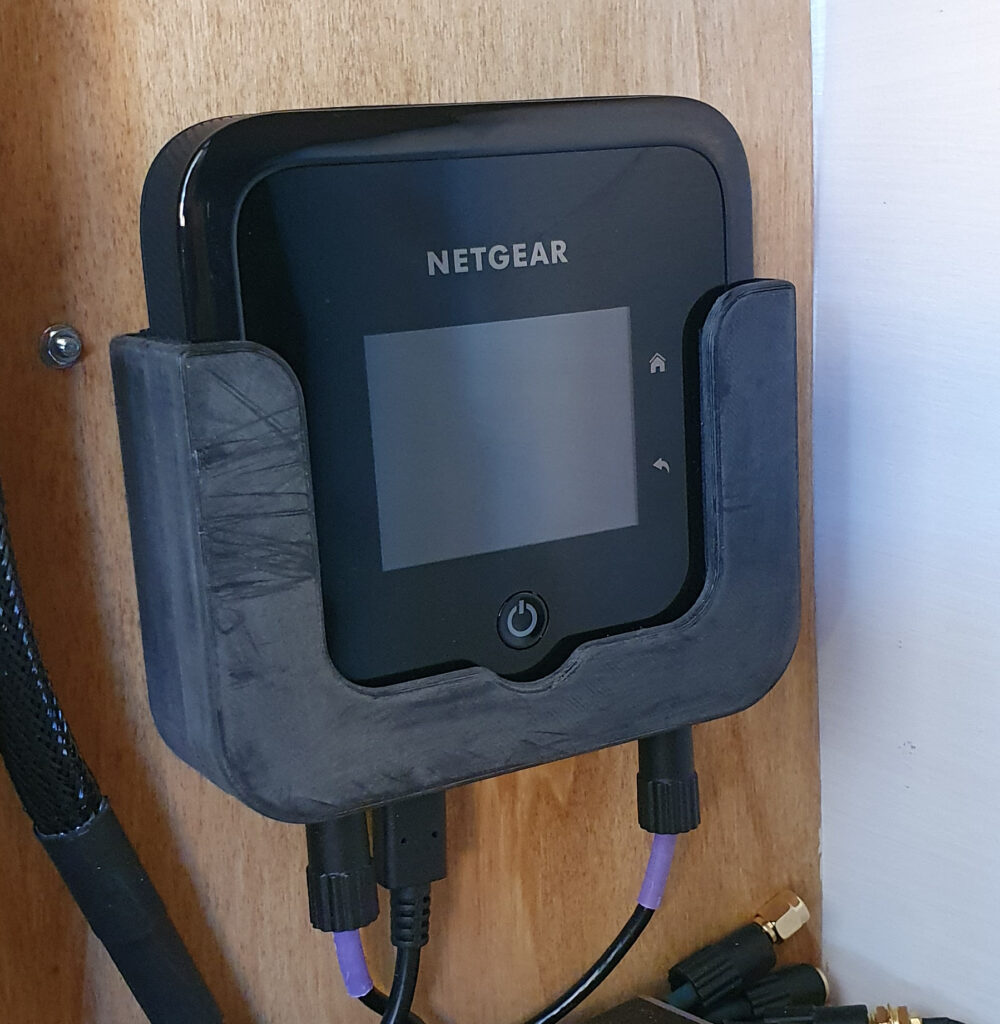
I have recently designed and printed a wall mount for Netgear’s Nighthawk mobile 5G/LTE routers. More specifically a Nighthawk M5 (MR5200).

I have been inspired by an existing commercial wall mount for the Nighthawk M-series routers by FTS Hennig GmbH:

My inspiration: the wall-mount and antenna adapter from FTS Hennig.

Unfortunately, the mount is with a price tag of around 50 EUR rather expensive. So I decided to use our new lab 3D-printer and try do design it myself usings AutoDesk’s Fusion 360 software. The result is released here under a creative commons license:

https://github.com/stv0g/3d-printing/tree/master/netgear-m5-holder

The mount contains two three mounting holes which can be used for screwing it against a wall as well as some cutouts at the bottom for the accessibility of the TS9 antenna, USB-C and Ethernet ports.

My model rendered by AutoDesk Fusion 360.

For the TS9 antenna ports, I am using the following TS-9 to SMA adapters which can be screwed into the respective holes of the mount. This allows a permanent installation of an external 5G/LTA antenna while the router can be easily removed as the adapters align right with the connectors of the router.

Screw-in TS-9 to SMA Adapters.
Final print.

Gaining Root Access on Netgear Nighthawk Mobile 5G/LTE Routers

This blog posts covers the required steps to gain root access via Telnet on Netgear Nighthawk Mobile 5G/LTE Routers. Its the first post in a small series covering my experiences playing around with this device.

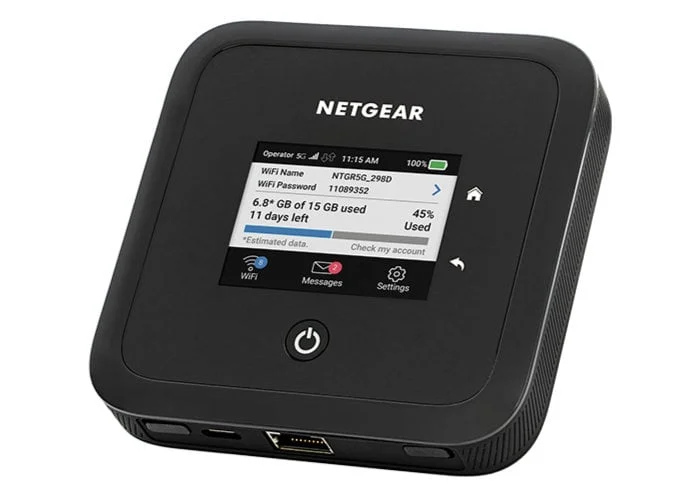
Last month I obtained one of Netgear’s latest mobile 5G routers, the Netgear Nighthawk M5 (model MR5200-100EUS) . Being one of the most expensive consumer 5G routers, I was lucky to get a fairly good second hand deal from eBay.

The router is powered by Qualcomm’s® Snapdragon X55 5G Modem-RF system. Looking closer at the internals of the device by checking the FCC filing for the closely related American model MR5100, we can see that the system consists of a Qualcomm SDX55 chipset which combines both the mobile baseband and application processors.

Gaining root access

Gaining root access to the device is actually fairly simple in comparison to rooting modern Android-based devices. The router exposes an open TCP port providing an AT command interface. However, this port is only accessible via a tethered USB connection, not via Wifi.

Using this AT command interface, we can interact with the modem, unlock an extended command set which allows us enable a Telnet daemon.

Detailed steps

1. Install the Sierra Wireless debug tools from bkerler:

sudo apt install python3 git
git clone https://github.com/bkerler/edl.git
cd edl
sudo python setup.py install

(More detailed installation instructions are covered in the README file of the repo.)

2. Connect your machine via USB-C to the Netgear router.

3. Make sure to disconnect from the Netgear Wifi.

4. Open a terminal an connect to the AT command interface via netcat (nc).
(Make sure not to miss the -c option as it will the enable nc to use the proper CRLF line-endings which are required for the AT interface).

nc -c 192.168.1.1 5510

4. Once connected to the AT command interface, you need to request a unlock challenge code by sending:

AT!OPENLOCK?

The previous command will return a challenge code which we use to generate a corresponding response code via the previously installed sierrakeygen.py tool:

sierrakeygen.py -l <replace_with_challenge_code> -d SDX55

The previous command will print out another AT+OPENLOCK command which you need to copy verbatim back to your AT command session.

5. Run the following AT commands to enable the Telnet daemon:

AT!TELEN=1
AT!CUSTOM="RDENABLE", 1
AT!CUSTOM="TELNETENABLE", 1

You can now close the AT command session by pressing Ctrl+C.

6. Power-cycle the Netgear Router to start the Telnet daemon.

Voila, you can now telnet into the device via both the tethered USB-C cable or Wifi.

nc -c 172.23.156.129 23
��������
mdm 1623 sdxprairie
/ # uname -a
uname -a
Linux sdxprairie 4.14.117 #1 PREEMPT Thu Aug 19 23:42:26 UTC 2021 armv7l GNU/Linux

Disclaimer: Please be aware that the device security is now breached as all devices connected to the Wifi or USB can gain root access to the device. The root Telnet login requires no password.

Next steps

Before proceeding we should make sure that we can bring the device back to a secure state by replacing the Telnet by an Secure Shell (SSH) daemon. In one of the next posts of this series, I will be building a statically linked version of the Dropbear SSH server to replace Telnet.

Before continuing my reverse engineering efforts on the device, I would like to ensure that I will not brick the router while doing so by dumping the firmware and extract all the details from it. This will allow us to hopefully restore the device by flashing the original firmware. Maybe we will be able to run OpenWRT on it.

I have also designed a wall mount for the router which allows me to mount it permanently into by van.

Open-Data Lab Aachen

Im September letzen Jahres hat sich in Aachen das Open Data Lab mit einer virtuellen Kick-off Veranstaltung gegründet.

Im Open Data Lab wollen wir ehrenamtlich Projekte rund um Offene Daten in Aachen voranbringen. Wir suchen dazu Personen, die daran generell interessiert sind, ob Entwickler*innen, Designer*innen, Datenjournalist*innen aus Verwaltung, Politik und Gesellschaft. 

Wir wollen Daten und Ideen zusammenbringen und daraus Projekte generieren.

Was ist Open Data?

Als Open Data werden Daten bezeichnet, die von jedermann zu jedem Zweck genutzt, weiterverbreitet und weiterverwendet werden dürfen. Einschränkungen der Nutzung sind nur erlaubt, um Ursprung und Offenheit des Wissens zu sichern, beispielsweise durch Nennung des Urhebers. Ausgenommen sind personenbezogene Daten sowie Daten, die anderweitig schutzwürdig sind.

Wer kann Mitmachen?

Im Prinzip ist jeder bei uns willkommen. Egal ob du bereits Vorkenntnisse hast oder nicht 🙂

  • Bürgerinnen
  • (Kommunal) Politikerinnen
  • Mitarbeiterinnen der Verwaltung
  • Wissenschaftlerinnen
  • Unternehmerinnen
  • Open Knowledge Labs & Digitales Ehrenamt
  • Datenjournalisteninnen
  • Studierende, SchülerInnen und LehrerInnen 

Aktuelle Projekte

Die folgende Liste ist eine Übersicht aktueller Projekte, die in Aachen im Umfeld des Open Data Labs mit offenen Daten entwickelt werden:

Mach mit!

Interessierst du dich für offene Daten? Macht mit und lerne uns beim nächste Treffen kennen. Dieses findet bereits nächste Woche statt:

Weiterhin kannst du uns auch online über folgende Kanäle erreichen:

GoSƐ – A terascale file-uploader

GoSƐ is a modern and scalable file-uploader focusing on scalability and simplicity. It is a little hobby project I’ve been working on over the last weekends.

The only requirement for GoSƐ is a S3 storage backend which allows to it to scale horizontally without the need for additional databases or caches. Uploaded files a divided into equally sized chunks which are hashed with a MD5 digest in the browser for upload. This allows GoSƐ to skip chunks which already exist. Seamless resumption of interrupted uploads and storage savings are the consequence.

And either way both upload and downloads are always directed directly at the S3 server so GoSƐ only sees a few small HTTP requests instead of the bulk of the data. Behind the scenes, GoSƐ uses many of the more advanced S3 features like Multi-part Uploads and Pre-signed Requests to make this happen.

Users have a few options to select between multiple pre-configured S3 buckets/servers or enable browser & mail notifications about completed uploads. A customisable retention / expiration time for each upload is also selectable by the user and implemented by S3 life-cycle policies. Optionally, users can also opt-in to use an external service to shorten the URL of the uploaded file.

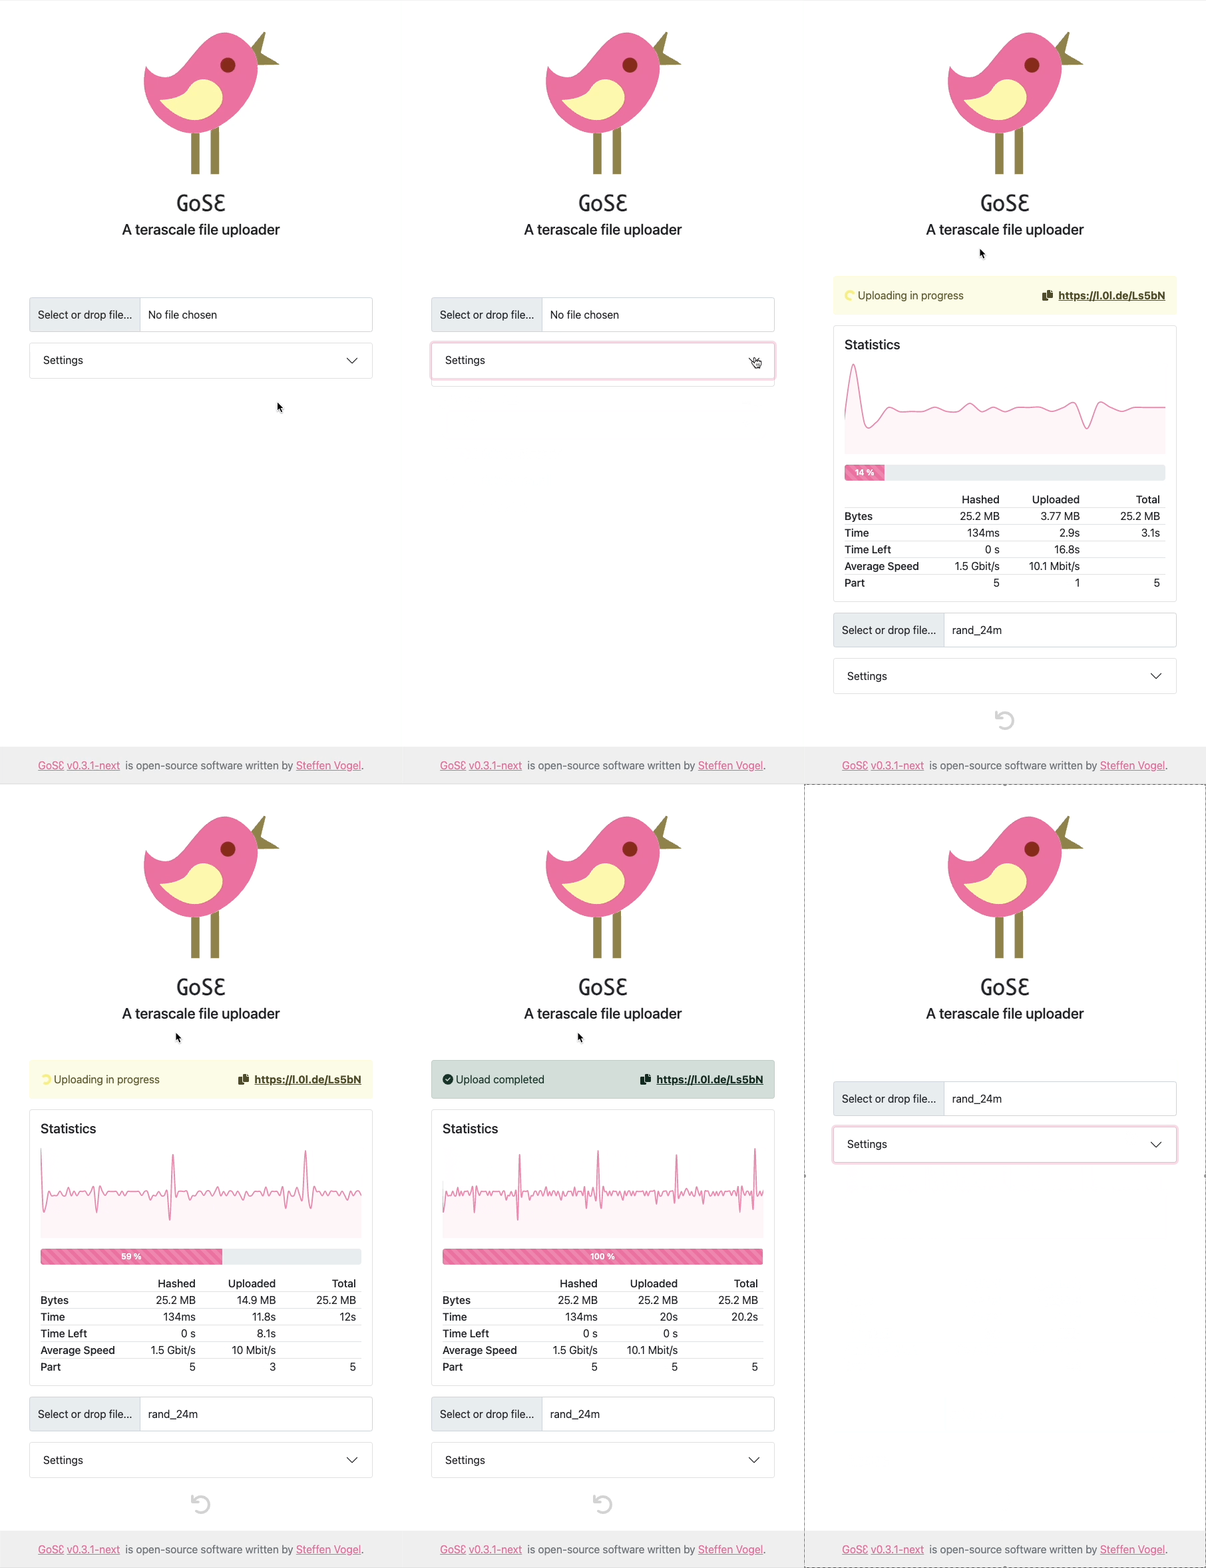
Currently a single concurrent upload of a single file is supported. Users can observe the progress via a table of details statistics, a progress-bar and a chart showing the current transfer speed.

GoSƐ aims at keeping its deployment simple and by bundling both front- & backend components in a single binary or Docker image. GoSƐ has been tested with AWS S3, Ceph’s RadosGW and Minio. Pre-built binaries and Docker images of GoSƐ are available for all major operating systems and architectures at the release page.

GoSƐ is open-source software licensed under the Apache 2.0 license.

Live Demo

Screencast

Features

  • De-duplication of uploaded files based on their content-hash
    • Uploads of existing files will complete in no-time without re-upload
  • S3 Multi-part uploads
    • Resumption of interrupted uploads
  • Drag & Drop of files
  • Browser notifications about failed & completed uploads
  • User-provided object expiration/retention time
  • Copy URL of uploaded file to clip-board
  • Detailed transfer statistics and progress-bar / chart
  • Installation via single binary or container
    • JS/HTML/CSS Frontend is bundled into binary
  • Scalable to multiple replicas
    • All state is kept in the S3 storage backend
    • No other database or cache is required
  • Direct up & download to Amazon S3 via presigned-URLs
    • Gose deployment does not see an significant traffic
  • UTF-8 filenames
  • Multiple user-selectable buckets / servers
  • Optional link shortening via an external service
  • Optional notification about new uploads via shoutrrr
    • Mail notifications to user-provided recipient
  • Cross-platform support:
    • Operating systems: Windows, macOS, Linux, BSD
    • Architectures: arm64, amd64, armv7, i386

Roadmap

I consider the current state of GoSƐ to be production ready. Its basic functionality is complete. However, there are still some ideas which I would like to work on in the future:

Also checkout the GitHub Issue Tracker for a detailed overview.