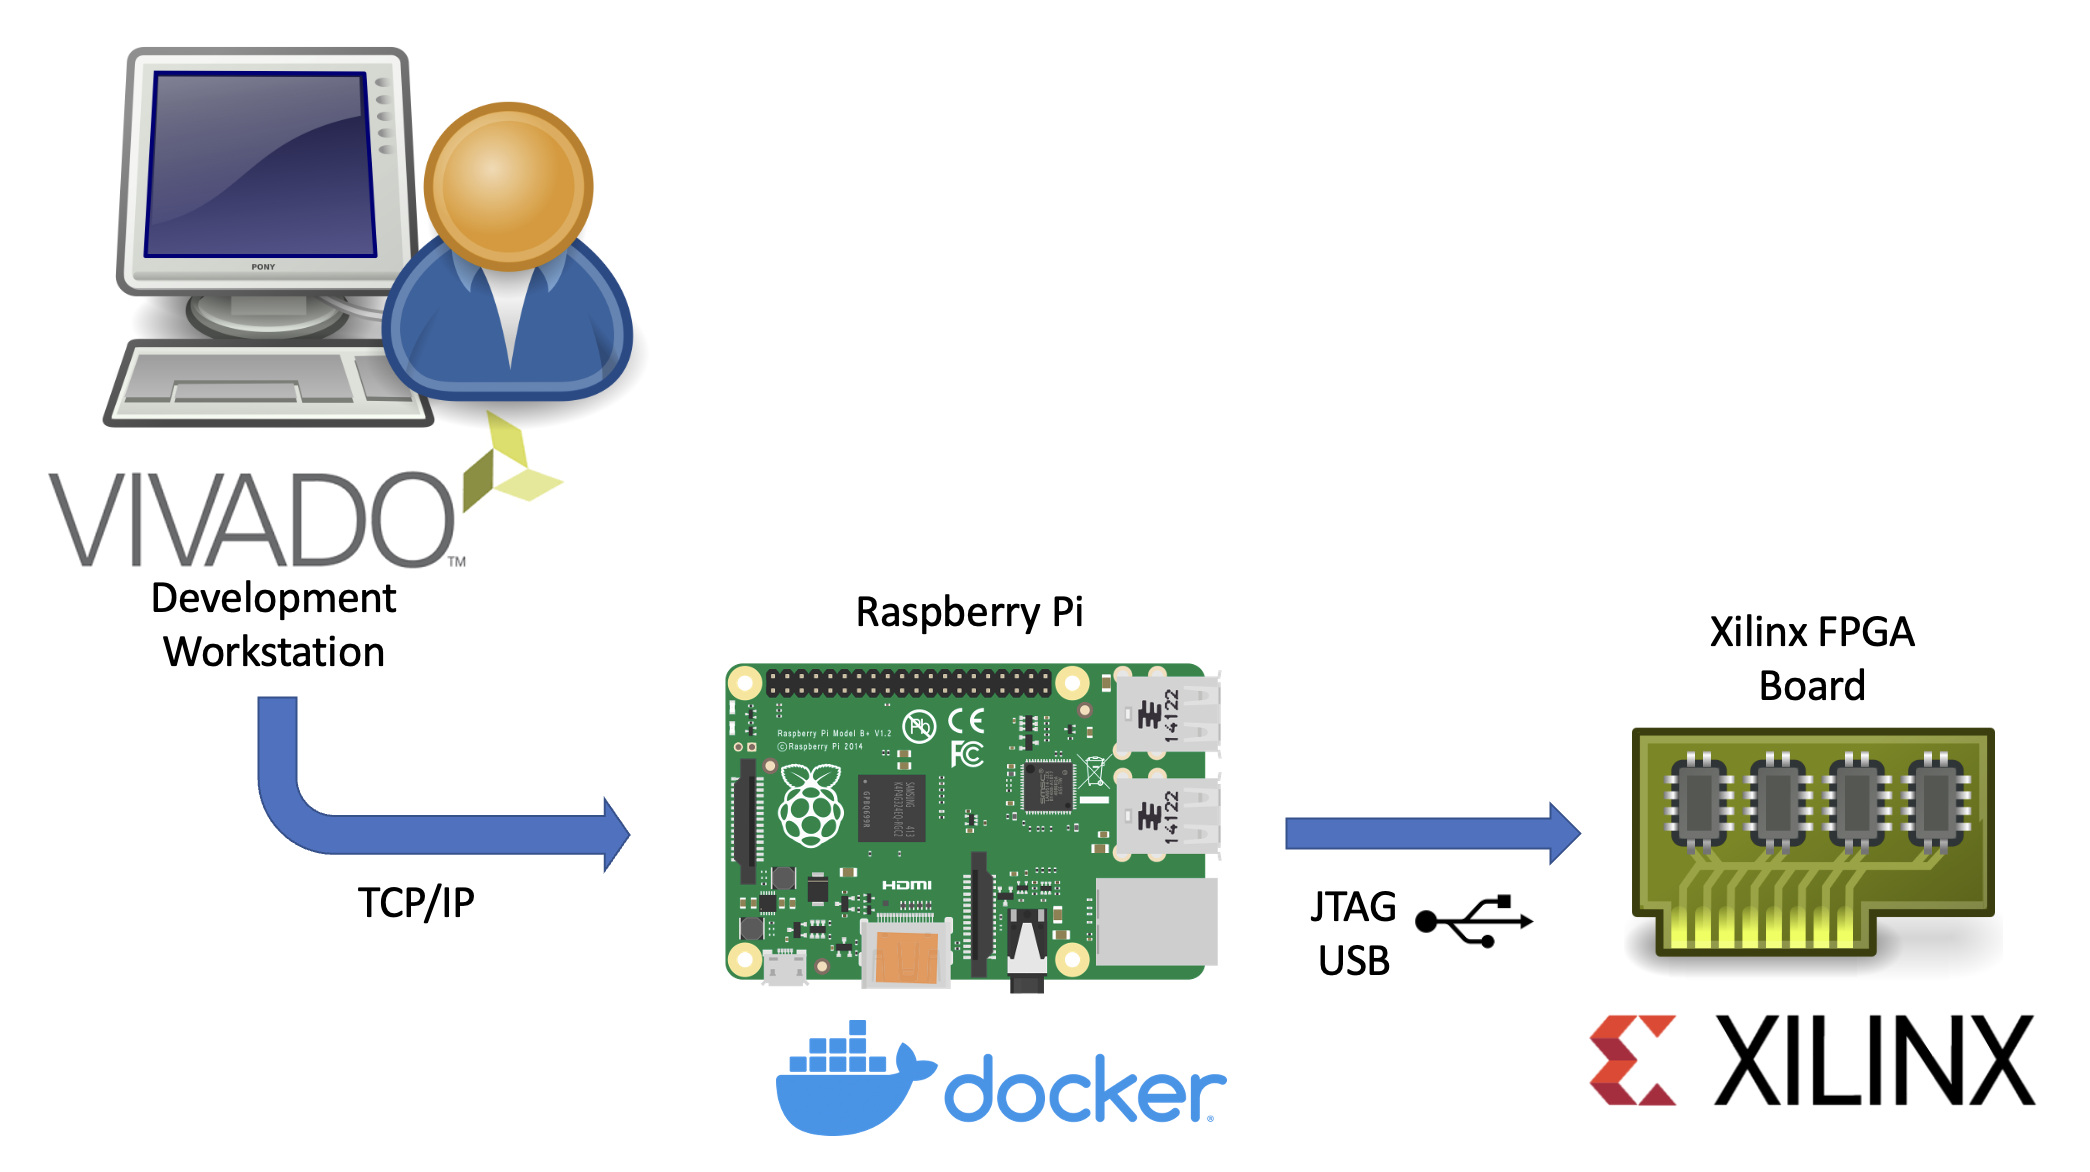
This article describes the necessary steps to run a Xilinx hw_server as a Docker container.
Xilinx’s hw_server is a command line utility which handles JTAG communication between a Xilinx FPGA board and usually the Vivado IDE. It can be used to configure the FPGA bitstream, connect to the embedded logic analyzer cores (ILA) or perform debugging of processor cores via GDB and the Xilinx System Debugger (XSDB). The hw_server is usually used when those tasks shall performed remotely as the connection between Vivado or XSDB is established via TCP connection and allows us to run it on a remote system.
Running the hw_server as a Docker container has the benefit that its installation is simplified to starting a Docker container by running:
docker run --restart unless-stopped --privileged --volume /dev/bus/usb:/dev/bus/usb --publish 3121:3121 --detach ghcr.io/stv0g/hw_server:v2021.2It also allows us to run the hw_server on architectures which are not natively supported by Xilinx such as the commonly used Aarch / ARM64 and ARMv7 architectures found in Raspberry Pis.
This is enabled by Dockers support for running container images for non-native architectures. I am using the aptman/qus image to setup this user-mode emulation. qemu-user-static (qus) is a compilation of utilities, examples and references to build and execute OCI images (aka docker images) for foreign architectures using QEMU’s user-mode emulation.
Run the following commands to run the hw_server on a embedded device:
# Install docker
sudo apt-get update && sudo apt-get upgrade
curl -sSL https://get.docker.com | sh

# Start Docker
sudo systemctl enable --now docker

# Enable qemu-user emulation support for running amd64 Docker images
# *Note:* only required if your system arch is not amd64!
docker run --rm --privileged aptman/qus -s -- -p x86_64

# Run the hw_server
docker run --restart unless-stopped --privileged --volume /dev/bus/usb:/dev/bus/usb --publish 3121:3121 --detach ghcr.io/stv0g/hw_server:v2021.2
This setup has been tested with a Raspberry Pi 4 running the new 64-bit Debian Bullseye Raspberry Pi OS.
The pre-built Docker image for the hw_server of Vivado 2021.2 is available via ghcr.io/stv0g/hw_server:v2021.2.
Detailed instructions can be found in the following Git repo: https://github.com/stv0g/xilinx-hw-server-docker.